
Source Filmmaker is a powerful tool developed by Valve for creating animations and visual content. SFMCompile refers to the essential process of converting assets into formats compatible with Source Engine.
Every animator needs to understand compilation to create professional animations. The process involves multiple steps and tools that work together seamlessly. Without proper compilation, your SFM projects will fail to display correctly.
This guide breaks down everything you need to know about SFMCompile in simple terms. Follow along to master the art of asset compilation for Source Filmmaker.
Understanding SFMCompile
SFMCompile refers to the process of converting raw 3D assets into formats compatible with Source Filmmaker. This includes transforming models, textures, animations, and maps into specialized formats like MDL, VTF, SMD, and BSP.
The compilation process is essential because Source Engine can only interpret these specific file types properly. Without proper compilation, assets may appear broken or fail to load entirely.
What Is SFM Compile?
SFMCompile is the process of converting raw files into Source Engine compatible formats. It transforms standard file types into specialized formats that SFM can use. The process applies to models, textures, animations, and maps.
Asset preparation is at the heart of SFM compilation. Every element requires proper compilation before use in Source Filmmaker. Think of compilation as translation between different file languages. The Source Engine can only read specific file types that result from compilation.
Why Compilation Is Important
Compilation ensures all assets work properly within the Source Engine environment. Without compilation, models won’t display or will appear broken in SFM. Rendering settings depend on properly compiled assets to work effectively.
Compilation optimizes assets for better performance during animation. It ensures textures appear correctly on models during rendering. Proper compilation prevents crashes when working with complex scenes.
It allows the engine to process files more efficiently during rendering. Animation sequences rely on compiled files to play smoothly. The quality of your final output depends largely on how well assets were compiled.
READ THIS BLOG: Tryst Agency: Unveiling the Secrets of Discreet Companionship Services
Tools Required for SFM Compilation

The main tools needed are Crowbar (a user-friendly model compiler with graphical interface), studiomdl (command-line model compiler), VTFEdit (for texture conversion), Hammer Editor (map creation and compilation tool), and Notepad++ (for editing QC script files). These tools work together to transform standard file formats into Source Engine-compatible assets.
Crowbar
Crowbar is an essential tool for model compilation in Source Filmmaker. It provides a user-friendly interface for the compilation process. The tool handles the conversion from SMD to MDL formats.
Crowbar supports batch processing for multiple models at once. It integrates with the Source Engine seamlessly for model compilation. This tool eliminates the need for complex command-line operations.
Crowbar includes decompilation features for existing Source models. It supports custom model paths and configurations. The latest versions offer improved compatibility with newer Source Engine builds.
studiomdl
Studiomdl is the core command-line compiler for Source Engine models. It transforms SMD files into MDL files that SFM can read. Studiomdl comes with the Source SDK package from Valve. It requires proper path configuration to function correctly.
The tool processes QC scripts to compile models properly. Model rendering quality depends on studiomdl’s compilation parameters. Experienced users prefer studiomdl for its precise control options.
It supports advanced features like physics models and hitboxes. Studiomdl can be automated through batch scripts for efficiency.
VTFEdit
VTFEdit converts standard image formats into Valve Texture Format (VTF). It handles texture conversion from PNG, JPG, TGA, and other formats. The tool includes options for texture compression and quality settings.
VTFEdit manages normal maps and other specialized texture types. It provides preview functionality before finalizing conversion. The tool supports batch processing for multiple textures.
VTFEdit integrates with material creation workflows. Texture processing becomes streamlined with this essential tool. It allows custom mipmapping for optimized game performance.
Hammer Editor
Hammer Editor is Valve’s official map creation tool for Source Engine. It integrates with the Source SDK for seamless map creation. The editor provides visual tools for building 3D environments.
Hammer includes texturing, lighting, and entity placement features. It compiles maps into BSP format required by Source Filmmaker. The tool supports prefabs for efficient map design.
Hammer Editor includes testing capabilities within the environment. 3D animation scenes often require custom maps created in Hammer. The tool provides extensive error checking during compilation.
Notepad++ (for QC Editing)
Notepad++ offers syntax highlighting for QC script editing. It makes QC files more readable through color coding. The editor supports multiple tabs for working with several files.
Notepad++ includes search and replace functions for efficient editing. It offers line numbering for error tracking in QC scripts. The lightweight editor runs smoothly alongside other compilation tools.
It supports plugins for enhanced functionality with Source files. Regular expressions in Notepad++ help with complex QC editing. The editor is free and integrates well into any SFM workflow.
Step-by-Step Guide to Model Compilation
Model compilation involves exporting your 3D model as an SMD file, creating a QC file with compilation instructions (defining materials, animations, and physics), and using Crowbar or studiomdl to transform these files into the MDL format. The QC file acts as a recipe that tells the compiler how to build the final model with all its components.
Preparing the Model
- Export your model from 3D software in SMD format.
- Ensure proper scale and orientation before exporting.
- Set up proper bone hierarchy for animations.
- Check face normals are pointing outward.
- Optimize polygon count for Source Engine performance.
- Prepare UV maps for textures.
- Separate the model into appropriate body groups if needed.
- Name bones consistently for animation compatibility.
- Remove any non-essential elements from the model.
Creating the QC File
- QC files contain instructions for the model compiler.
- Include the model name and file paths in the QC.
- Specify the model rendering settings in the file.
- Define animation sequences within the QC.
- Set up material paths for textures.
- Configure hitboxes and collision models if needed.
- Include bodygroups for swappable model parts.
- Set up attachment points for effects or props.
- Define physics properties for interactive models.
Compiling the Model with Crowbar
- Launch Crowbar and navigate to the Compile tab.
- Select your QC file using the browse function.
- Choose the correct game configuration.
- Set output directory for the compiled model.
- Enable relevant compilation options.
- Click Compile to begin the process.
- Check the log for any errors or warnings.
- Verify the output MDL file was created successfully.
- Test the model in SFM after compilation.
Texture and Material Compilation
Textures must be converted from standard formats (PNG, JPG) to VTF using VTFEdit. Materials are defined in VMT text files that specify how textures should appear on models, including properties like shininess or transparency. Both files must be placed in the correct directory structure to be recognized by Source Filmmaker.
Converting Textures to VTF Format
- Open VTFEdit and select Import option.
- Choose your source texture file (PNG, JPG, TGA).
- Set appropriate texture processing options.
- Configure mipmaps for better performance.
- Select compression format based on texture type.
- Choose normal map options if applicable.
- Configure alpha channel settings if needed.
- Click Create to generate the VTF file.
- Save the file to your materials folder.
Creating a VMT File
- VMT files define how textures appear on models.
- Create a new text file with .vmt extension.
- Specify the shader type (VertexLitGeneric is common).
- Reference the VTF texture file path.
- Add parameters for shininess, transparency, or other effects.
- Include normal map references if used.
- Set up environmental mapping if needed.
- Save the VMT in the same folder as the VTF.
- Keep naming consistent between files.
Applying Textures to Models
- Ensure VMT and VTF files are in the correct materials folder.
- Match the folder structure referenced in the QC file.
- Check material paths in the model’s QC file.
- Recompile the model if material paths change.
- Test the model in SFM to verify textures load correctly.
- Adjust VMT parameters if textures appear incorrect.
- Use Crowbar’s model viewer to check textures before SFM.
- Create multiple materials for different parts of complex models.
- Organize materials in logical folder structures.
Compiling Animations for SFMCompile
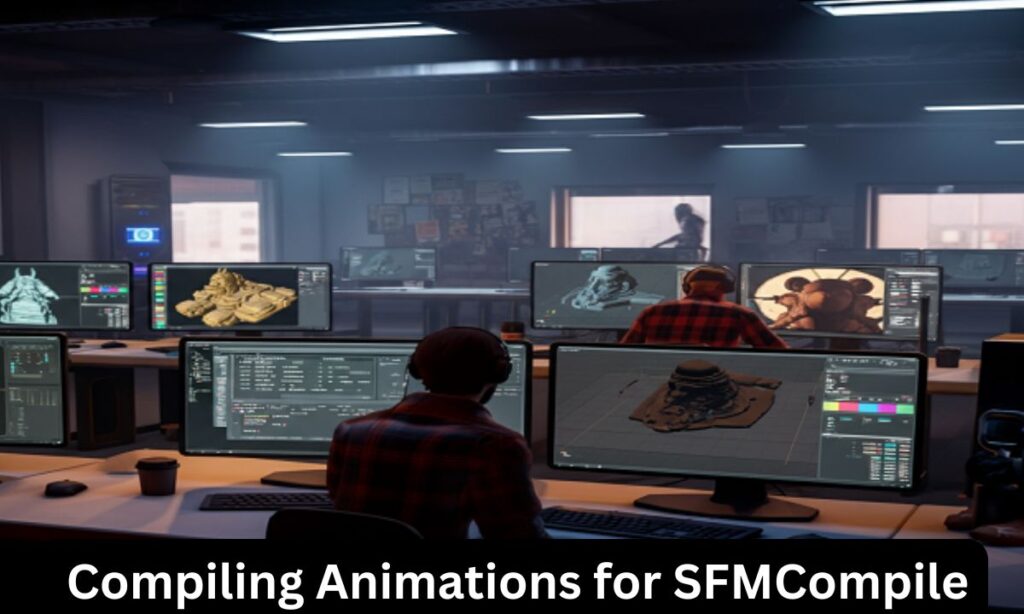
Animation compilation requires exporting animation sequences as SMD files, updating the model’s QC file with $sequence commands that reference these animations, and recompiling the model. Each animation needs proper frame rate settings and can include additional parameters for looping or blending behavior.
Preparing Animation Files
- Export animations as separate SMD files from your 3D software.
- Maintain consistent bone naming between model and animations.
- Keep animations at appropriate frame rates (usually 30 or 60 fps).
- Check for any bone weighting issues before export.
- Ensure animation scale matches model scale.
- Create logical start and end poses for looping animations.
- Name animation files clearly to identify content.
- Group related animations in folders.
- Test animations on a simple rig before final export.
Editing the QC File for Animations
- Add $sequence commands for each animation.
- Specify animation SMD file paths.
- Set frame rate using fps parameter.
- Configure loop settings if needed.
- Add activity names for AI-controlled characters.
- Set blend transitions between animations.
- Include weight lists for partial animations.
- Specify animation events at specific frames.
- Configure animation flags for special behaviors.
Compiling Animations Using studiomdl
- Open command prompt in your model directory.
- Run studiomdl with the path to your QC file.
- Include any necessary command-line parameters.
- Check console output for compilation errors.
- Verify all animations compiled successfully.
- Test animations in SFM or Model Viewer.
- Adjust QC parameters if animations need fixing.
- Recompile after any QC changes.
- Create batch files for frequent compilation tasks.
Map Compilation for SFM
Maps are created in Hammer Editor using brushes for geometry, textures for surfaces, and entities for lighting and objects. Once designed, maps are compiled into BSP format through Hammer’s compilation tools, which optimize the level for rendering and add lighting calculations. The compiled map can then be loaded into SFM as an environment.
READ THIS BLOG: Writing GreenHeal Blog Posts That Matter: Tips for Impactful Eco-Wellness Content
Creating a Map in Hammer Editor
- Launch Hammer Editor from the Source SDK.
- Create a new map file.
- Build basic geometry using brush tools.
- Apply textures to surfaces.
- Add lighting using light entities.
- Place props and models for detail.
- Configure skybox and environmental effects.
- Add camera reference points for SFM.
- Set up proper scale for character animations.
Compiling the Map to BSP Format
- Open the Run Map dialog in Hammer.
- Select appropriate compile settings.
- Choose between Fast, Normal, or Full compile.
- Enable HDR lighting for better visual effects.
- Run the compilation process.
- Check the compiler output for errors.
- Fix any reported issues in your map.
- Optimize the map if compile time is excessive.
- Save the compiled BSP file.
Loading the Map in SFM
- Launch Source Filmmaker.
- Create a new animation set or session.
- Use the Load Map option.
- Browse to your compiled BSP file.
- Wait for the map to load completely.
- Check for any missing textures or errors.
- Add lighting if the map lighting isn’t sufficient.
- Position cameras for your animation scenes.
- Save your SFM session with the map loaded.
Troubleshooting SFMCompile Issues
Common problems include missing textures (often due to incorrect file paths), model errors (typically from QC syntax issues), animation problems (frequently caused by skeleton mismatches), and map loading failures (usually from compilation errors).
Most issues can be resolved by checking file paths, verifying syntax in configuration files, and ensuring all components are properly exported and placed in the correct directories.
Model Errors
- Check QC file for syntax errors or missing paths.
- Verify SMD files are properly exported.
- Ensure all referenced files exist in specified locations.
- Look for bone hierarchy issues in the original model.
- Check for unsupported features or parameters.
- Validate material paths are correct.
- Examine compiler log for specific error messages.
- Try simplifying the model to isolate problems.
- Update tools to latest versions if errors persist.
Texture Issues
- Confirm VTF files are properly converted.
- Check VMT syntax for errors.
- Verify file paths in VMT match actual file locations.
- Look for unsupported texture formats or sizes.
- Check for power-of-two dimensions in textures.
- Ensure alpha channels are properly configured.
- Try different compression settings in VTFEdit.
- Check for case sensitivity in file paths.
- Validate texture folder structure matches references.
Animation Compilation Problems
- Check for bone name mismatches between model and animations.
- Verify animation SMD file format is correct.
- Look for invalid frame ranges in QC file.
- Check for missing animation files.
- Validate that animations use the same skeleton as the model.
- Look for incorrect fps settings.
- Check for oversize animations that exceed Source limits.
- Verify sequence commands in QC are properly formatted.
- Try compiling animations separately from the base model.
Map Loading Issues
- Check for compiler errors in Hammer’s output.
- Look for missing textures or models referenced in the map.
- Verify the map isn’t too complex for Source Engine limits.
- Check for leaks in the map geometry.
- Ensure all entities are properly configured.
- Try compiling with simplified settings first.
- Validate the map file is in the correct location.
- Check for corrupted BSP files.
- Verify Source Filmmaker has access to the map directory.
Frequently Asked Questions
What causes “ERROR: Material not found” messages?
This usually occurs when VMT files are missing or in the wrong directory. Check your material paths and ensure both VMT and VTF files are in the correct folders with matching names.
Why are my compiled animations not playing in SFM?
Animation issues typically stem from skeleton mismatches or QC configuration problems. Verify bone names match between model and animations, and check sequence parameters in your QC file.
How can I optimize large models for better performance?
Reduce polygon count, lower texture resolutions, and simplify bone structures. Use LOD (Level of Detail) settings in your QC file and optimize collision models.
Why does my compiled map have missing textures?
Missing textures usually indicate that texture files aren’t in the expected directories. Check material paths and ensure all custom textures are properly compiled and placed in the materials folder.
What’s the difference between Crowbar and studiomdl for compilation?
Crowbar provides a graphical interface and handles multiple steps automatically, while studiomdl is a command-line tool offering more precise control. Beginners typically prefer Crowbar, while advanced users may opt for studiomdl.
Conclusion
SFMCompile is a fundamental process for anyone working with Source Filmmakers. Mastering compilation techniques ensures your models, textures, animations, and maps work flawlessly within the Source Engine. The tools covered in this guide—Crowbar, studiomdl, VTFEdit, Hammer Editor, and Notepad++—form the backbone of any serious SFM workflow.
Asset optimization through proper compilation directly impacts the quality of your final animations. Remember that troubleshooting is part of the learning process, and each compilation challenge you overcome builds valuable experience. With practice, the compilation process becomes second nature, allowing you to focus on the creative aspects of animation. Keep this guide handy as you explore the limitless possibilities of Source Filmmaker and elevate your cinematic creation skills to new heights.

David is a seasoned SEO expert with a passion for content writing, keyword research, and web development. He combines technical expertise with creative strategies to deliver exceptional digital solutions.


